
Upgrading and customizing classic cars is a shared passion among car enthusiasts. One popular modification for the 1992 Corvette is upgrading stock tail lights to LED lights with load resistors. This simple yet impactful upgrade helps modernize your vehicle, providing superior lighting performance while preserving its vintage charm.
This guide will walk you through everything you need to know about removing the stock tail lights on your 1992 Corvette and installing LED lights with load resistors, ensuring you get the results you’re looking for confidently and correctly.
Why Upgrade a 1992 Corvette’s Tail Lights to LED?
Upgrading to LED tail lights offers several benefits, making it a popular choice for Corvette enthusiasts. Here are the most compelling reasons to make this change:
- Improved Visibility: LED lights produce a brighter, more intense light compared to traditional incandescent bulbs. Brighter lighting improves visibility for other drivers, enhancing overall safety.
- Energy Efficiency: LEDs consume less power than standard bulbs, reducing the strain on your Corvette’s electrical system.
- Modern Appearance: LED lights provide a sleek, contemporary look without compromising the Corvette’s classic design.
- Longevity: Unlike incandescent bulbs, LED lights are designed to last significantly longer, reducing the need for frequent replacements.
- Customization: Many LED tail lights offer features such as sequential lighting patterns, adding a personalized touch to your car’s look.
Of course, when upgrading to LEDs, you’ll often face fast-blinking or “hyper-flashing” signals due to the lower electrical resistance of LED bulbs. This is where a LED load resistor comes into play, ensuring your vehicle’s lights function properly without triggering warnings or issues.
Tools Required for the Project
Before you begin, gather the following tools and materials to ensure a smooth installation process:
- Screwdrivers (flathead and Phillips head)
- Socket wrench set
- LED tail light bulbs compatible with the 1992 Corvette
- Load resistors compatible with your chosen LED bulbs
- Wire connectors (such as quick splice connectors or soldering equipment)
- Electrical tape
- Multimeter (optional, but useful for testing connections)
- Gloves for safe handling of bulbs and wires
Ensuring that everything is within reach before starting avoids delays and allows you to complete the installation efficiently.
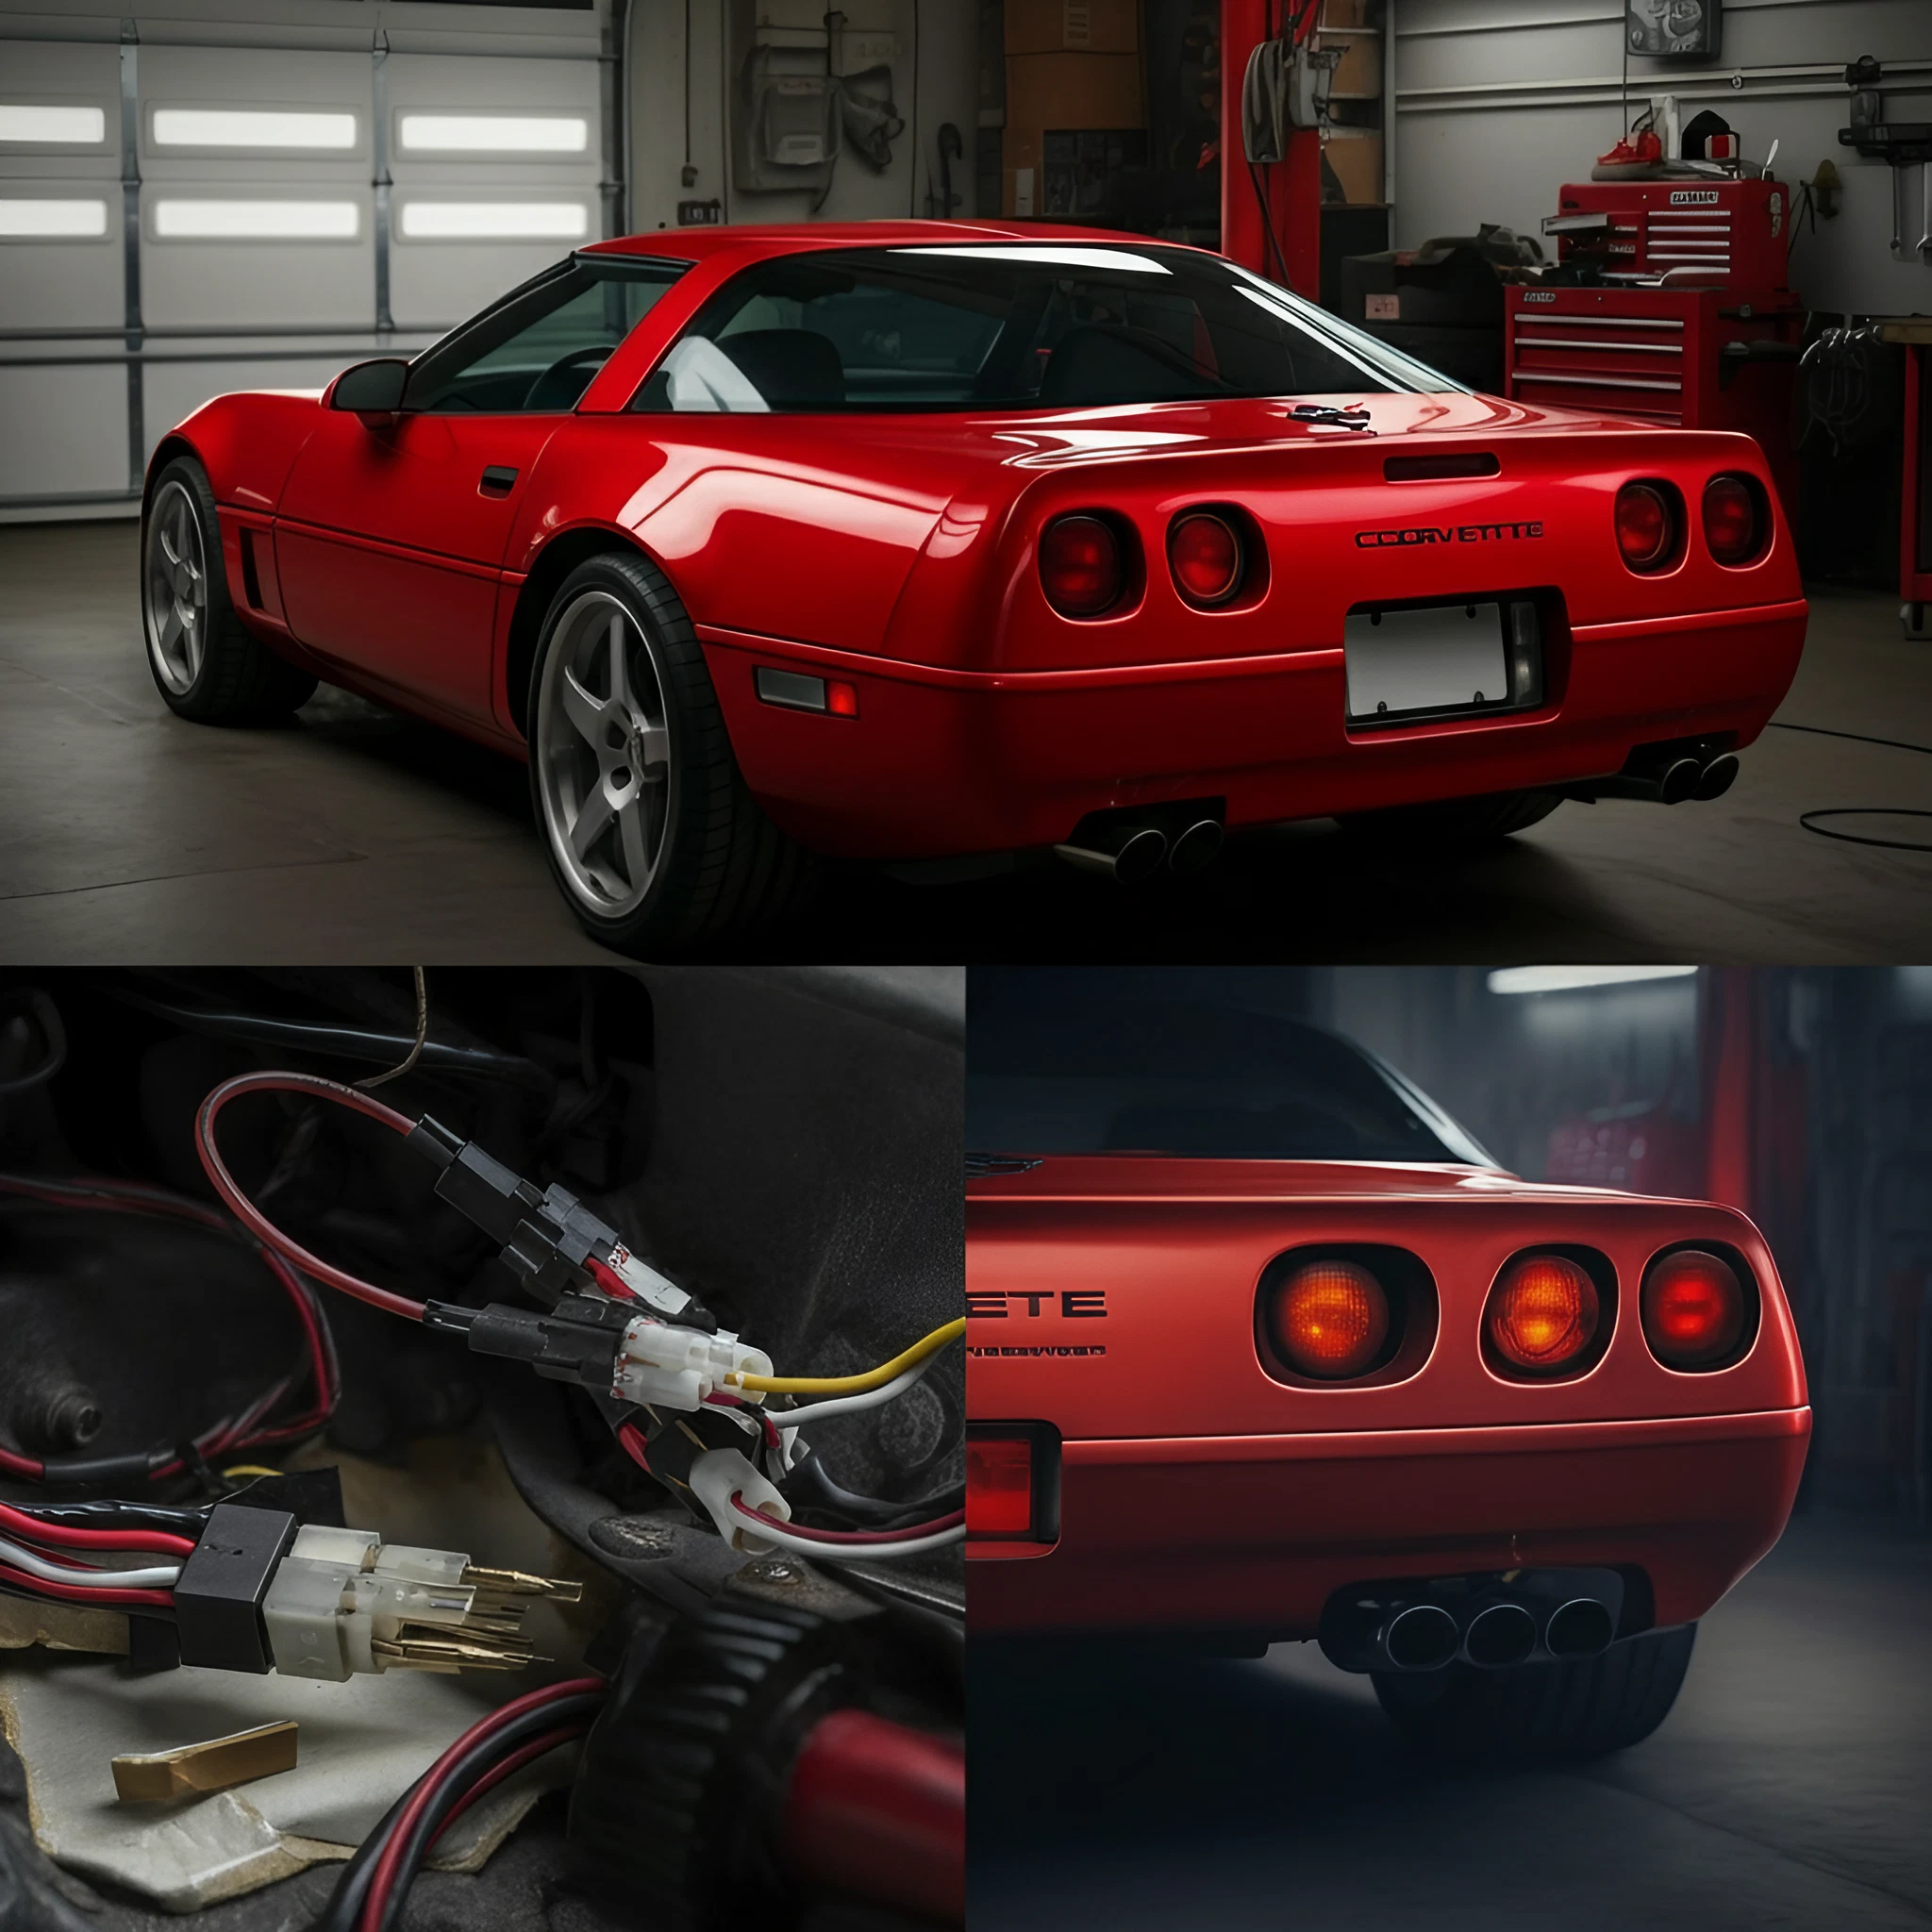
Step 1: Remove the Original Tail Lights
The first step is removing the stock tail lights from your 1992 Corvette. This process will give you access to the bulbs and wiring harnesses.
Instructions for Tail Light Removal
- Open the Rear Hatch: Begin by opening the rear hatch of your Corvette to access the tail light assemblies.
- Locate Tail Light Screws: Find the screws that secure the tail light assembly to the car body. These are usually located around the edges of the light housing.
- Remove the Screws: Using a Phillips screwdriver or socket wrench (depending on the model setup), carefully remove the screws.
- Extract the Tail Lights: Gently pull the tail light assembly out of its housing. Be cautious not to disconnect or damage the wiring harness.
- Detach the Wiring Harness: Unplug the wiring connection by gently pressing the release clip and pulling it free.
At this point, your tail light is fully removed and ready for the upgrade process.
Step 2: Install the LED Tail Lights
Once the original tail light assembly is out, you can install the newly selected LED bulbs.
- Replace the Bulbs: Remove the old incandescent bulb from its socket and insert the new LED bulb. Ensure it sits securely in the socket. Test briefly by turning on your lights to confirm they work.
- Position the Load Resistors: To prevent hyper-flashing or error codes, load resistors need to be installed parallel to the LED circuitry.
Here’s how to install the load resistor properly:
Installing the Load Resistors
- Identify the Wires: Use a multimeter or the vehicle’s wiring diagram to locate the correct signal and ground wires for your tail light system. These wires typically connect to your Corvette’s turn signals or brake lights.
- Secure the Resistor: Most load resistors come with mounting brackets. Secure them to a metal surface inside the tail light housing to prevent heat buildup.
- Connect the Resistor Wires: Attach one end of the resistor wire to the signal wire and the other to the ground wire. Use wire connectors for a secure and reliable connection. If you’re comfortable soldering, soldering the connections is even more durable.
- Wrap the Wires: Once connected, wrap the joins in electrical tape for additional security and to protect against water or dust exposure.
A Quick Note on Placement
Load resistors heat up during operation, so avoid placing them near plastic or flammable components. Opt for metal surfaces where heat can dissipate safely.
- Reattach the Wiring Harness: Once the load resistor and LED bulbs are installed, reconnect the wiring harness to the main connection point for the tail light assembly.
- Test the Lights: Before reinstalling the tail light assembly completely, test the lights again. Check turn signals, brake lights, and reverse lights to ensure they are functioning as expected with no hyper-flashing or dimming.
- Reinstall the Tail Light Housing: Secure the tail light assembly back into the housing by reversing the removal process. Tighten all screws evenly, ensuring the assembly sits flush with the car body.
Step 3: Final Checks and Adjustments
Before hitting the road, take a few minutes to thoroughly inspect your installation:
- Double-Check Connections: Ensure all wires are securely fastened and insulated with electrical tape.
- Test All Lighting Functions: Confirm that all functions, including brake lights, turn signals, and running lights, are working correctly.
- Check for Heat Build-Up: After using the lights for a few minutes, check that the load resistors aren’t overheating excessively.
Once you’re satisfied, your 1992 Corvette’s LED tail light upgrade is complete!
Benefits of Your Finished Upgrade
Upgrading to LED tail lights with a proper load resistor setup provides measurable improvements to your Corvette’s functionality and aesthetics. Here’s how the results stack up:
- Stylish Tail Lights: The modern design of LED lights boosts the overall appearance of your classic Corvette.
- Reliable Performance: Reduced power draw and longer-lasting bulbs translate to fewer replacements and maintenance sessions.
- Safe Driving: Bright and clear LEDs add an extra layer of safety, particularly during night driving or adverse weather conditions.
Start Upgrading Your Corvette Today
The “1992 Corvette remove tail lights for LED load resistor” upgrade isn’t just about aesthetics; it’s a practical improvement that enhances safety and functionality. By following this guide, you can confidently complete the installation and enjoy the benefits of modern LED technology in your classic car.